Journibles

February 26, 2018

Since my post in January when I shared my new traveler's notebook and my Lamy fountain pen, one more traveler's notebook has come to live with me and two more Lamy Al-Star fountain pens have been added to my collection, which is super fun...I love my fountain pens. I have learned so much from Brian Goulet @ GouletPens.com. Be sure to check them out!  


But my most favorite find is this book called a Journible


You copy Scripture on the right side page and the left side is used for taking notes. I love this whole idea and look forward to writing very day! 


Note: I only share items that I love and I am not compinsated in anyway for sharing. =) 

Have a happy Monday!! 
Sew Sweet Bee Blocks

February 23, 2018

A few more blocks from my Sew Sweet Bee sisters have been showing up in my mailbox. It's so much fun being Queen Bee and I am so excited about putting this quilt together!

This beauty is from Cathy @ A Quilting Chick.


This one is from Donna @ Donna's Lavender Nest. Love my new scissors fob! 


This sweet block and microwave bowl is from Linda. =) 


And today's mail brought me a beautiful orange block from Tuki!! 


You can find the instructions on how to make a Pinwheel Block block on my tutorial page. =) 

Have a happy weekend!!


SaveSave

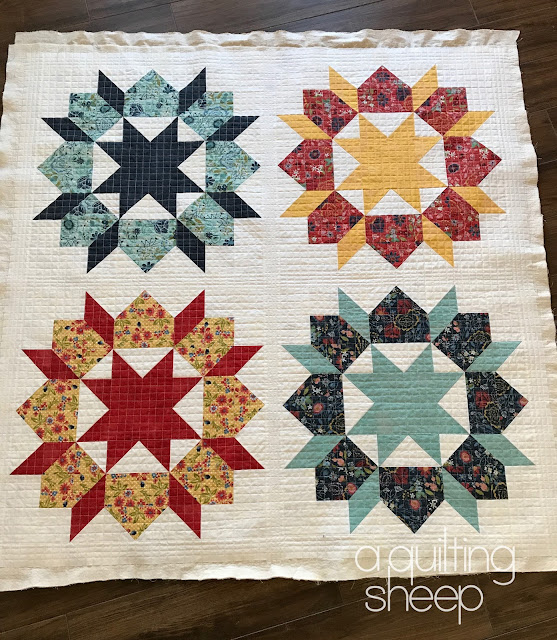
Swoon baby quilt - Quilted

February 16, 2018

Wednesday I did a talk/demo on how to baste a quilt and how to quilt using a walking foot. Since it was my first time to teach, I wasn't really sure what to do and how to teach it. I ended up taking a lot of quilt samples of how I have quilted quilts using my walking foot and did very little in the demo part. It was a good class, but next time I will have students bring their machines and have them practice on some small quilts, too. 

So, the Swoon quilt I talked about here that was to be my demo was brought home and I finished it up today. 


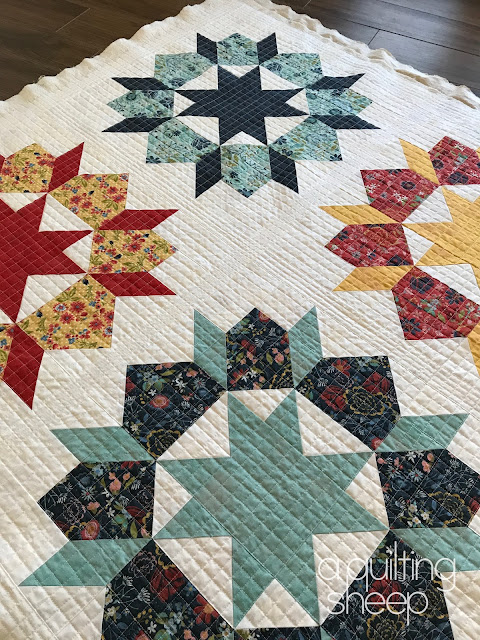
The lines are approximately 3/4" apart. All organic quilting with no marking. I just eyeball and go. 


The quilting lines in the sashing are a little closer together. I use the seams in the quilt as my guides for the first pass. I really should take pictures of my technique sometime, huh? 


The texture will be awesome after it is washed...


Next week I am teaching a class on how to add a binding all by machine. I will be using this quilt to show how I do that.  


Have a happy weekend!!


Queen Bee - Sew Sweet Bee

February 15, 2018

The mail days are going to be fun the next couple of weeks because the Pinwheel Star blocks I have asked my bee sisters to make are beginning to show up! The first one came yesterday, which made my awesome Valentine's Day, even better!! 

Lisa @lisa12822 on Instagram made this gorgeous block!! I told the ladies they got brownie points if they could make one with orange or yellow Bonnie and Camille fabrics. Lisa nailed it! I feel very honored she shared some of her precious Bonnie and Camille stash with me in such a beautiful way. I may or may not have hugged her block...Just sayin'...


You can find the tutorial to the Pinwheel Star block in my tutorial section

Have a happy Thursday!

Sewing Room ~ mini update

February 6, 2018

I decided the other day that I needed to change things up a little bit in my sewing room. I have been looking at this wall hanging for a very long time. It was time to make something new to hang in its place. 


What could be more perfect than Thimble Blossoms original Spools quilt pattern? Some of my most treasured  Bonnie and Camille scraps are in this quilt. 


Saturday I spent the day making a sewing machine cover for my Bernina. Nadra @ Ellis and Higgs wrote a great tutorial. It is written in German, but Google translate is helpful in figuring it out. It took me longer to decide how to design it than to make it. I did forget to curve a couple of the corners, but it looks okay and it isn't worth the time and energy to undo the binding to fix that, right? 


For the ties, I used twill ribbons from Moda fat quarter bundles. I have a box full of them! 


The back side of my cover...


The two tutorials can be found here: 

Have a happy day!

Pinwheel Star - Sew Sweet Bee

February 1, 2018

This is my fourth year to be a member of an online bee called Sew Sweet Bee. Donna @ Donna's Lavender Nest is our hostess of the mostest and keeps us all organized! February is my turn to be Queen Bee. =) This year I have asked my hive sisters to make me a Pinwheel Star (or a Lemoyne star) using any of Bonnie and Camille's fabric lines.  This block has many variations and you can make it only using half square triangles, however, trimming lots of half square triangles is not my favorite thing to do, so I worked out the block to use HST and flying geese. You get less HST to trim and fewer seams in the final block.

Let's get started, shall we? 


For a 12" finished block, you will need two fat eighths of contrasting colors and a fat quarter (there will be left over) of a background color. In my case, Kona Snow. 

Cutting Instructions:

From each of the two contrasting colors cut (4) 3 ½ x 3 ½ squares and (2) 4” squares.


From the background fabric cut (4) 3 ½ x 3 ½ squares and (4) 3 ½ x 6 ½ rectangles. 


Gather all the  4” squares to make 4 half square triangles (HST). I draw two lines to sew on and cut them apart in the middle. Press them towards the dark side. 


Square them up to 3 ½” and set them aside for now. 


Next, you make (4) flying geese units using the (4) 3 ½” x 6 ½” background rectangles and (4) 3 ½” squares of each color.  Sew all 4 of one color on one side of the flying geese and then sew all 4 of the other color on the other side of the flying geese. I go ahead and sew an extra line on the flying geese where it gets trimmed off to make bonus HST for other projects. 


Press to the wings. 


Lay out your blocks so that the HST form a pinwheel that matches up with the flying geese. (So sorry the picture is so blurry!)


Now sew the HST into a pinwheel. On the back side of the pinwheel, I remove a few stitches and swirl the center seam to make it lay flatter. The pinwheel should measure 6 1/2" x 6 1/2". 


Now it's time to assemble the block!

Sew the (4) 3 ½” background squares on each end of two flying geese blocks and press to the background squares.


Sew 2 flying geese blocks to the pinwheel block and press towards the pinwheel. 


The seams should all nest nicely when you sew the three rows together to make your Pinwheel Star.


If you have any questions, don't hesitate to ask! 


Related Posts Plugin for WordPress, Blogger...