...Giveaway closed...
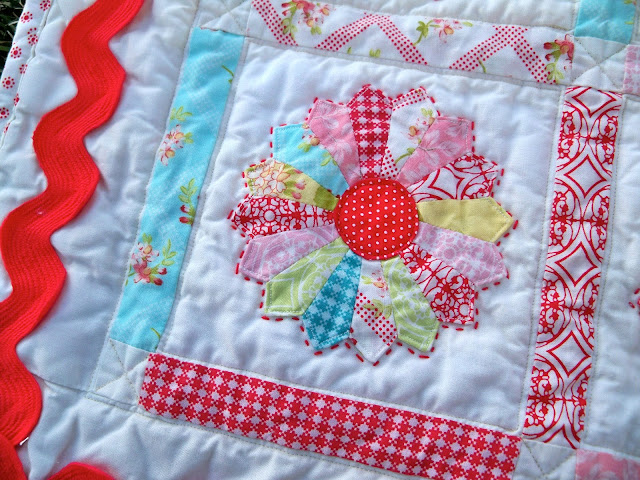
This one was a fun pattern because, as most of you already know, I seriously love Dresden Plates!
These are tiny. The smallest I have ever made. The strips are 2 1/2 inches wide, which means this is a great pattern to use with jelly roll strips. It doesn't take a lot of fabric, so its also a great scrap buster type of pattern. I am going to use this quilt as a wall hanging in my kitchen, so I chose fabric to go with the new paint that will be on the kitchen walls at the end of the month. I have high hopes. =D
Love chain piecing.
A handy dandy thread cutter. It was the best $5 I have spent on a gadget.
Blades waiting to be pressed.
The pattern gives detailed instructions on how to press the fan blades after they are sewn together so the plate will lay nice and flat after its pressed. It was the first time pressing my Dresden Plates with all open seams and seeing how well my plates turned out, I will be pressing my Dresden's with open seams from now on.
Note to self...Take a picture of the back of the plate so my peeps can see how nice the seams look...
The trickiest part of the Dresden plate, at least I think so, is making the circles. I tried doing them the way the pattern suggested, but I couldn't get them to lay nicely. It's completely my error, not the patterns fault or the technique suggested because I have seen others use this technique. I ended up doing it my way which is to starch the fabric like crazy and press the edges around a circle template. They are far from perfect. I need to get this figured out. I like my circles to be perfectly round.
This was new for me. The pattern tells you to chain piece the pieces together and NOT clip the connecting threads or press. It was kind of tricky, but I really liked this method of getting the rows together (the pieces didn't get mixed up) and I liked not having to pin to get the seams lined up. I attribute this method as the reason why my corner stones did so well with staying lined up. Always a good thing. =) After it was all one piece, I then took it to my table for a good pressing.
The quilting process has begun....
The rest of my quilting I am going to do by hand with perle cotton.
I loved this pattern and it's one I would do over and over again. It's easy, fairly quick and fun. It makes a nice size wall hanging (26" x 26"), small baby quilt or a nice table topper.
Did you notice in one of the earlier pictures, that the paper was still on the fan template that came with the pattern? You know what that means, don't you??
I would love to gift this pattern to one of you, dear friends....All you need to do is leave me a comment. If you want, let me know what your favorite quilt block is. =)
I will draw a winner on Sunday, 11th of December. It will be my birthday present to YOU.
✸✸✸✸✸✸✸✸✸✸✸✸
This is very important:
Please make sure you are not a "no-reply" blogger (see button in my side bar to learn how to check to see if you are or not) or I won't be able to contact you and I will have to draw a new name.
✸✸✸✸✸✸✸✸✸✸✸✸
Have a great one!


