Zuma Obsessed

December 11, 2018

Last week I brought home a fat quarter bundle of Tula Pink's Zuma. Within days I had that baby opened, and cut! I rarely do that! I usually let the fabric sit for a while, but I had to play with this fabric now!! The colors are so rich and full!! I love the areas where you can see fluorescent colors pop!

photo source
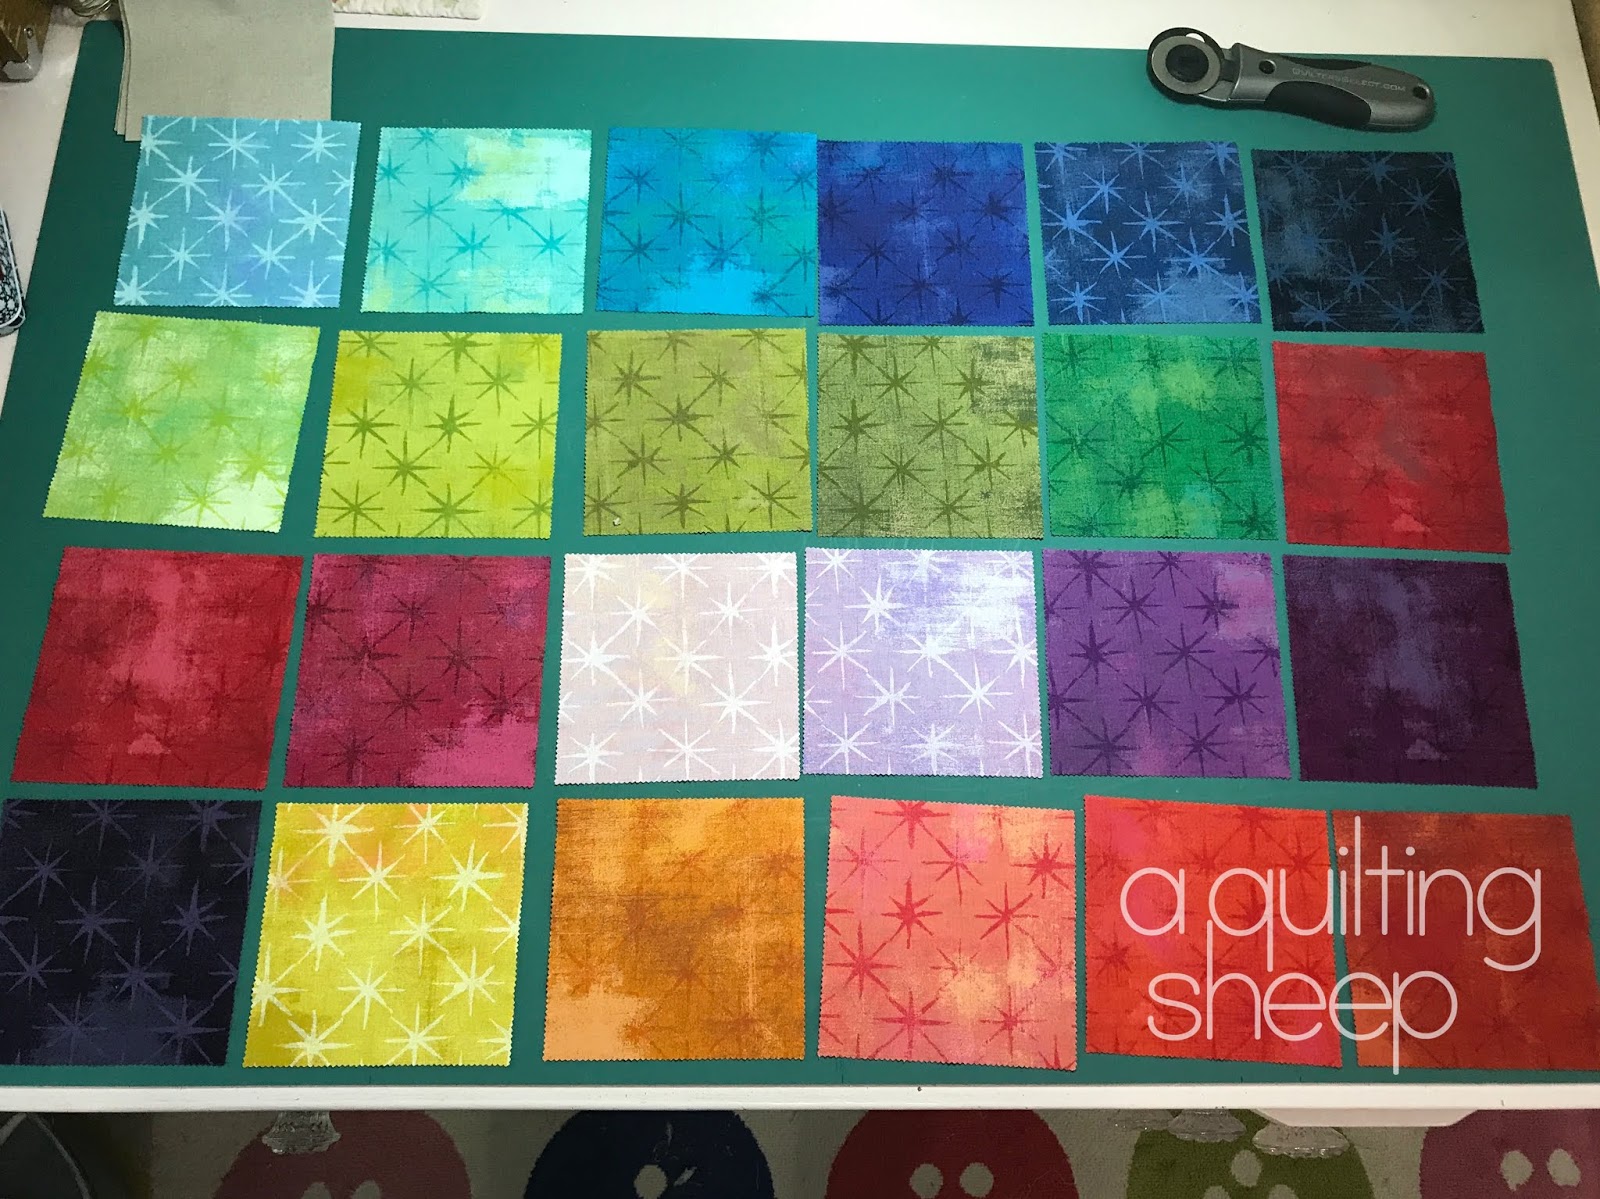
I decided to use the pattern Shimmer by Cluck Cluck Sew. To make the twin sized quilt,  I needed a total of 30 fat quarters. I had removed the six fat quarters in the original bundle that read too light and went through my stash to pull twelve coordinating fabrics to add to the group. Moda Grunge, Peppered Cotton by Studio E and Blueberry Park by Robert Kaufman


This is only one of many pictures I took while sorting and deciding how to group the fabrics for each block and how to lay them out. I found that this pattern is one where you need to have a plan before you make the blocks. I wanted the warm and cool colors, the prints and the solids to be as balanced as  I could get them without over thinking it to death! By the way, I made a couple of changes after I had decided this was the final layout. LOL! 


I have one block finished! With all the prep work I did to get to this place, it went together quickly and easily and it came out the right size! Yay!! 


With Christmas right around the corner, I will only be able to grab a few minutes here and there to make more blocks. That forces me to enjoy the process, right? 

If I don't post again until next year, I want to take the time to wish you all a very Merry Christmas. 

The God of all creation humbled Himself to become a human being—our Savior, Christ the Lord.  Because Jesus was born He could die, bringing the abundance of life we enjoy through Him.  May each of you rest in the security of the Babe whose birth we celebrate this day.

Stitched With Love

November 8, 2018

Loved making this mini quilt!! 💕


No Name Scrappy quilt

November 5, 2018

I have been spending my time getting the tops I basted this past spring and summer quilted. I don't like to have too many quilt tops sitting around and I am the same way about having too many (more than 5) tops basted and waiting to be quilted. This is the last one I had pre-basted this last spring. Unfortutuantly, now that the weather has turned cooler, the ability to use basting spray outside to baste the quilt tops that are in line to be basted has passed. They will either wait until spring and summer to get basted, or I will baste them in the house. Not my favorite thing to do, but it is what it is...

Here is what I am calling my No Name Scrappy quilt. She deserves a name so feel free to spam me with name ideas!! 


I made it with the 2 1/2" squares in my Bonnie and Camille scrap bags. Earlier this year, I went through all my scraps and precut them to size. When I was cutting my B&C fabrics, I knew I had to make something with them ASAP and that's how this quilt was born. 


Some of the square in a square blocks are made with 4 patches and others are 4 1/2" squares. It finishes up at 64" x 64". A nice lap size...


I quilted it in a spiral square on point. I started it with a flower-like design in the pink square then started the square spiral from there. 


 While I was outside getting pictures of the quilt, I couldn't resist snapping a picture of the last two flowers that are hanging on...For now! 


Until next time!! 


Sew Sweet Bee 2017 - Friendship Love

November 1, 2018

I finished my 2017 Sew Sweet Bee quilt this week. 
You can find the tutorial for the Friendship Love block here


The carpet of leaves look pretty...


My label along with the label made by Denny @laughsewgarden


This weekend we will be busy raking up the pretty carpet of leaves. *wink*

Temperature Quilt - Progress

October 24, 2018

It's been a while since I have shared how my temperature quilt has been progressing. As you can see from the grass, it is a frosty morning here in Iowa and fall is in full swing. I fully expect the leaves to come tumbling out of the trees in full force in the next week or so. 


I love seeing the color changes in the quilt as the temperatures change in the seasons. If you look closely on the bottom row, the temperature stayed within 5 degrees so the high and low temperature for that day used the same color! 


You can find the other updates on this quilt here, here and here


 Since my faithful friend Clay was outside keeping watch on the deck on this beautiful fall morning, I couldn't resist snapping a picture of him. I fear this will be his last fall with us. He will be 15 in a few months, so my time with him is limited. I am grateful to have had him this long. He is a good dog...


Have a sweet day!! 

Free-Wheeling Single Girl - Progress

October 18, 2018

The Free-Wheeling Single Girl Sew Along is nearing the end. I am very thankful for Sewtopia, The Next Stitch and Denyse Schmidt for hosting this fun sew along because I don't know if I would ever attempt to make this quilt without their tips and support. They saved this amazing pattern from languishing in my stash.  
As I mentioned in an earlier post I chose to use mostly Denyse Schmidt fabrics with a bit of Moda Grunge and Cotton & Steel in the mix. 


For a while, I toyed with the idea of changing the background to Grunge Fig instead of Kona Snow. I like how it looks together, but I needed a second opinion.  The consensus was the Grunge Fig was too prominent and took the eye away from the rings and I really wanted the rings to shine. 


I let the blocks sit like this for a long time. I was very nervous about sewing those curves!! 


Some of the time I used glue to put the pieces together and other times I used the pinning method. My 2 cents. When using the glue method, my sewing was more accurate but took longer to put them together. Pinning them was faster, but I was less accurate because the fabric shifted, even with a lot of pins. In the end, I used the pin method more often. I knew that they were all going to be trimmed and I had 64 of these blocks to make with two curves to each block. It would have taken forever to use the glue method. The key to sewing curves is to take your time. They are not as hard to sew as I feared. 


I am glad I used Kona Snow. I like the traditional look. 😊


My next decision was what to use for the backing fabric. I loved the sheep in the Cotton & Steel Panorama line, so I bought half yard cuts of each color to audition which one I liked best. They all looked good! 


I gave hubby the choice, since this quilt will be on our bed eventually, and he chose the PINK! Yay! 


I have all 16 circles made, but there isn't room to lay them all out! Each circle is 22"! It's going to be a big one. I haven't decided how big to make the border. I do know I want it to be square so it can lay on the bed in any direction. Until I decide, I am not going to sew them together. Easier to store a pile of blocks instead of a large quilt top. 😄


Have a great fall weekend!! 

Turning Points Pillow - A Shop Sample

October 8, 2018

This weekend I made a pillow using this pattern. 😀 It's a paper pieced pattern, but very simple so don't let that intimidate you. 


I chose a charm pack of Grunge Stars for the triangles and a natural linen and cotton for the background. 


I messed up on the first quadrant by not reversing the colors. I forgot paper piecing turns things backward. Oh, well!😉 


Halfway done!


All quilted! 


All finished! The blog where the tutorial was shared on how to make a Quilted Zipper Pillow Cover no longer exists, but I had a copy that I placed on Dropbox. Let me know if the link works for you.


One of these days I'll share my progress on the Free Wheeling Single Girl quilt. Sewing curves is a first for me! 

What have you been working on? 

Barn Star II, a shop sample

September 19, 2018

Sometime in the next couple of months, I will be teaching a class on how to piece this darling little quilt by Corriander Quilts called Barn Star II.  For the sample, I chose the fabrics Vintage Holiday by Bonnie and Camille


I am usually wary of charm pack patterns because they often tell you to cut the 5" charms in fourths and even though mathematically, I should end up with 4 - 2 1/2" squares, I never do. They end up smaller and I have to adjust seam allowances when piecing. Often times, I end up with things that don't line up and piece together well. Instead, when I use patterns that call for 2 1/2" squares, I cut them from fat quarters or from scraps. Never a charm square. This pattern did not call for any 2 1/2" squares. Yes, there was some waste with the charm square, but the pieces are cut accurately and thus, it pieced together like a dream. I will make this pattern again! 

Do you have a favorite charm pack pattern? 

Until next time! Have a happy, quilty day!


Related Posts Plugin for WordPress, Blogger...